How to Increase RAM on Minecraft Launcher


An easy method to increase Ram on your Minecraft launcher for better gameplay and mods or Modpacks that require more power.
Increasing Ram on Minecraft Launcher
Having problems with your game crashing after opening world with the Minecraft Launcher? We have the solution for you. All you need to do is assign more ram for your Minecraft launcher so that the game can run more smoothly with out crashing. This is for Java versions of Minecraft.
Usually as default it assigns 1 or 2 GB to your Minecraft game so if your using a large mod pack or just a lot of mods you will normally need to up this. This also applies if you have a lot of plugins or other in game features which require some more power to them to keep the game running.
Things to be Aware of by Increasing Ram on Minecraft Launcher
So you might think its best to increase ram to as much as possible but this can also prove detrimental. How ever your computer needs a certain amount of ram to run its self. So be aware of how much you are increasing it by as if you add too much of your ram to Minecraft and your computer cant cope with the other processes it will still inevitably crash. So if you pc has 8GB ram, dont assign 8GB to Minecraft as the rest of the system wont be able to cope with little to no allocation of ram.
How to Increase RAM on Minecraft Launcher
Please be aware we are using the official Minecraft launcher. Other launchers may vary.
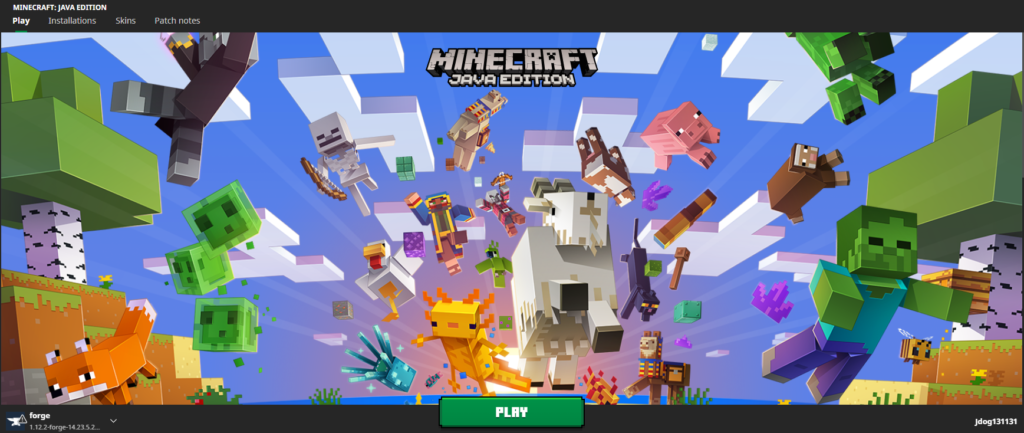
- Open up your Minecraft launcher on your computer.
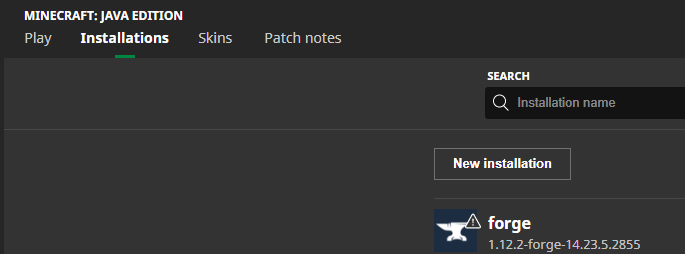
- Go to the Installations tab on the top of your launcher.
- Now hover over the version/installation you want to increase ram on. And select the three dots.
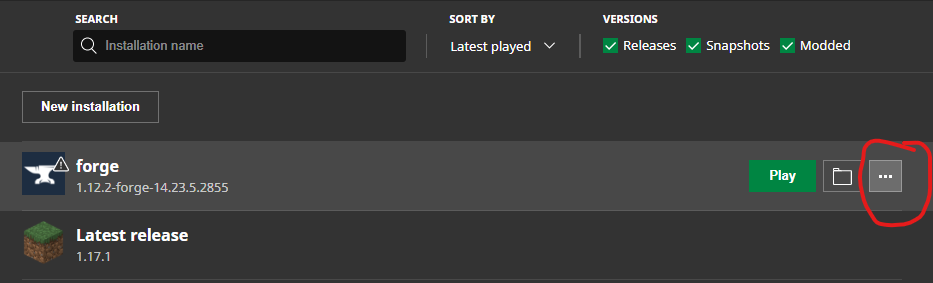
- Select edit from the options you are provided.

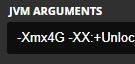
- Go to the bottom of the page and click on “more options” to bring up the ram allocation part we need to change.
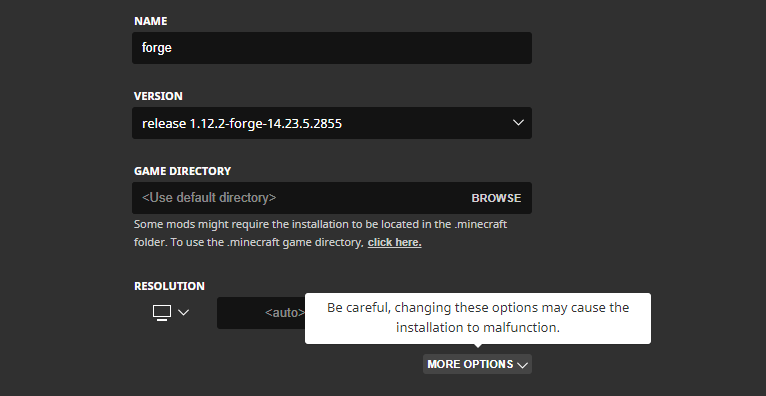
- This is where you can increase how much ram is allocated to Minecraft.
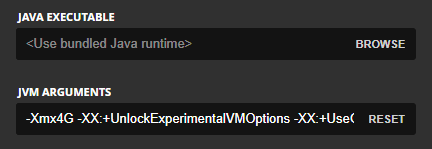
- The amount allocated is in the “Xmx4G” part. In this case it is 4 GB. You will normal start with “Xmx2G” meaning you have 2 GB allocated to Minecraft.
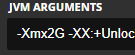
- Change the number and only this number to the amount of ram you want to allocate to your Minecraft launcher. So in the above picture allocating 2 GB we will allocate 4 GB again by changing the 2 to a 4.
- Now make sure to save your changes.

Conclusion
Now with your ram increased for Minecraft you can go ahead and join the big modded servers or even create a modded server yourself with our Modpacks.
If you ever want to change it back to what it normally was, then follow the same process but change the number back to 1 or 2 depending on how much you started with.