Tag: server

Online Marketing Tips Types Of Hosting Find Expired Domains Expired Domains Guide Invest In Domains .Tech Domain Names

How To Safely Transfer Your Server Files To an Updated Version

In this article we find out how to safely update your server to a new version with the same world and plugins. So bring your 1.19 server into the 1.20th + century!

cheap minecraft servers with discount

Problems with Updating Minecraft Server Files

So first lets explain some problems that people encounter when updating servers.

First, its confusing when you are not sure what file does what. As your server can hold many files and folders. All of which as either essentials or hardly needed making it harder to guess what to update, or bring over with you to the updated version.

So the first problem people may encounter is not bringing the right folders over, too many folders or mixing folders up. So lets go through the importance of and details of the files and folders first. We will do this for a Java server.

An important thing to remember that is server hosting will try to create any missing folders when the server starts. So if you upload everything but the plugins folder. A new and default plugins folder will be created for you.

Java Server File and Folders
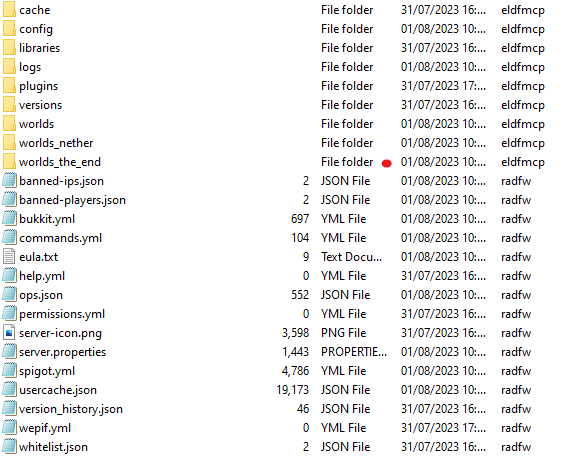
minecraft server files for updating

Cache – Medium

Here we have the version cache of the current version you are using. This folder is created after you start a new server and is automatically created.

For server updates and transfer i dont normally bring this folder

Config – High

This is important to bring over as it has your current saved configurations. So they way you have set your server e.g. server settings and other configuration will be here. By not bringing this over to the updated server you will start with default settings as the folder will be created as default.

Libraries – Medium

Libraries have all the information for your Minecraft version. This is often a heavy folder, especially if you use via plugins as they need to have more libraries ready.

These will also be created once you start a new server version or update your existing one. So unless you made specific changes to it, you dont need to transfer your old libraries to your new server. they will simply be created from scratch.

Logs – Low

Logs will simply log activities or errors on your server in a viewable txt document. I dont normally bring these over with me, unless you have an error you want to check from the past. They aren’t that useful and your new server will create this folder from fresh once you start running your world.

Plugins – High

update minecraft server plugins
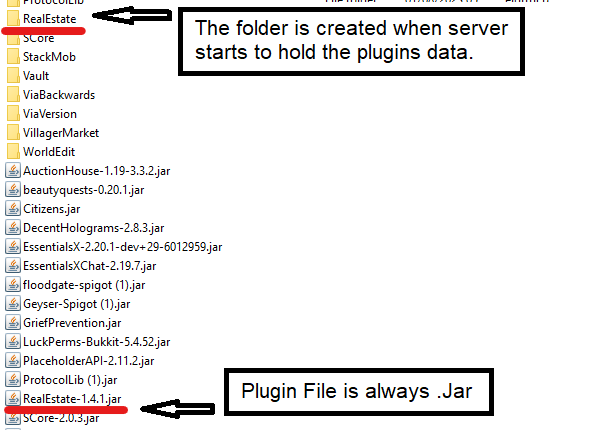
This folder contains the plugins themselves (as .jar files) and then the relative folders they create with the plugin data as well. Now the reason i have put this as high is because if you dont transfer this it will just create an empty plugin folder.

So first you need to check your plugins are compatible with the newest version and update the .jar file accordingly to have the latest plugins version. (leave the plugin folder to retain the plugin data from previous version).

Upon moving the plugin folder to the new or updated server they should all work, any that dont show up when you type in /plugins. Or show as red will either need updating or need removing.

Versions – Medium

Although this is an important folder. It is automatically created by the server hosting once the server is started in a new version so in most cases you dont need to transfer it over.

Worlds, Nether and the End – High

These are by far the most important folders. This holds your current world, your nether world and the end world data. These will need to be moved over unless you are looking to start a brand new world, nether and the end.

Banned IP’s .Json – Medium

This contains any banned IP’s from your last server. So if you have banned people by IP, I recommend bringing this over with you. otherwise it will just create a new blank file once the updated server version is started.

Banned Players .Json – Medium

This contains any banned players (by username)  from your last server. So if you have banned people by username, I recommend bringing this over with you. otherwise it will just create a new blank file once the updated server version is started.

Bukkit & Spigot .Yml – Low

Here are the settings for the Spigot and Bukkit version. I have both options as im using a paper type server. You might only have 1 depending on what version you are using for you server. These are not that important to bring over to the new server as they get generated automatically. So unless you have made changes to your existing server you dont need to bring these over. If you have made changes then make sure to bring them over to the new updated server.

Commands & Help .Yml – Low

These hold you custom commands or help commands. Unless you have made any changes here there is no need to bring them over to an updated server as these get created as default if they are missing from the server on start up.

EULA .Json – Low

This is the Minecraft agreement that needs to be done on a server installation and start up. This is done automatically and there is no need to transfer this file over to an updated Minecraft server.

OP’s .Json – Medium

I would recommend bringing this file over to your new updated server. This will let the server know who you have as op’s so you dont have to go through the process of making the op players op again.

Permissions .Yml – Medium

This is only if you use the pre build bukkit permissions system. If you have used this then this is important to bring over with you to the new server after update. Otherwise it will be created as a default folder once you clear your old server and update to new.

Server-Icon .PNG – High

This is your custom server icon. If you have a server icon here then you should move it other wise your updated server will be using the default icon again when people join.

Server Properties – High

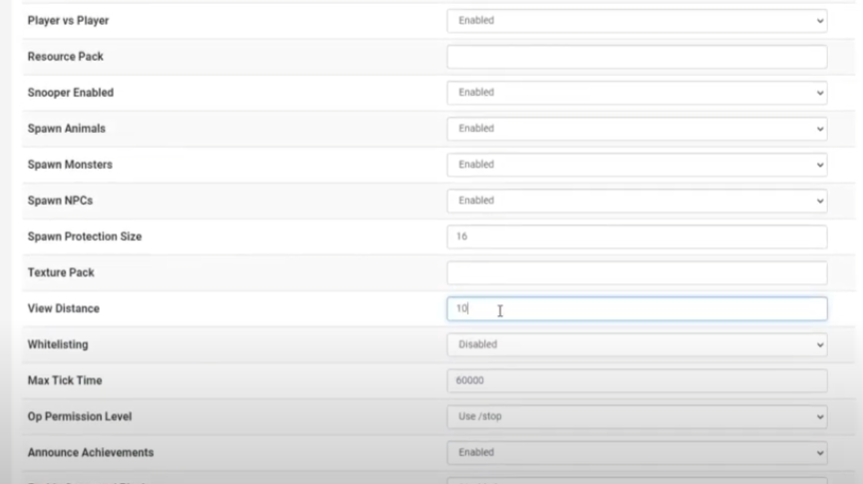
This contains all the main server settings for your current server. Bring these over to retain the same server settings. Otherwise the folder will be created as new on the new server and you will have to make the same changes again.

User Cache .Json – Medium

This can be important in most cases. So this will have specific data about players stored here. If you want you players to start a fresh however with no previous data about them on the server then you can let the server create this file automatically and not transfer it over.

Whitelist .Json – High

The reason for this being set to high is that if you use a white list, this is where the player names are stored. So if you dont bring this file over to the new server then you will have to manually whitelist all the players again.

What Files Do I Need To Tranfer?

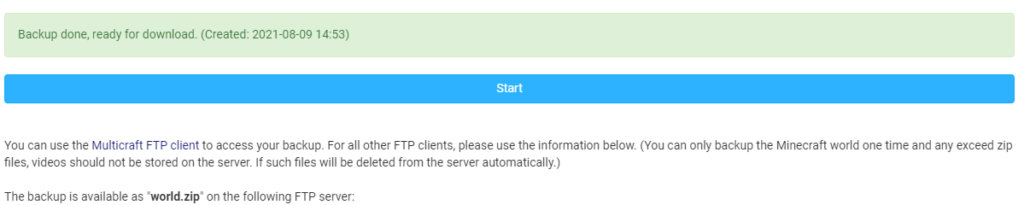
So first, take a backup of all the files you need from the list above. As an absolute minimum i suggest the following ones for your worlds (choose your world name), configuration and plugins. I recommend using FileZilla to connect and move files and folders to your pc.

  • config
  • plugins (if you have plugins)
  • world
  • world_the_nether
  • world_the_end
  • server.properties
  • ops.json

This one for worlds, plugins, configuration, banned users and whitelisted players.

  • config
  • plugins (if you have any)
  • world
  • world_the_nether
  • world_the_end
  • banned_ips.json
  • banned_players.json
  • whitelist.json
  • server.properties
  • usercache.json
  • ops.json

And this one I recommend for anyone wanting to retain the maximum data from the old server to move onto the new one.

  • config
  • plugins (if you have any)
  • world
  • world_the_nether
  • world_the_end
  • banned_ips.json
  • banned_players.json
  • whitelist.json
  • server.properties
  • usercache.json
  • bukkit & spigot .yml (if altered)
  • server-icon.png
  • ops.json

How to Transfer Server Files To a New Updated Server

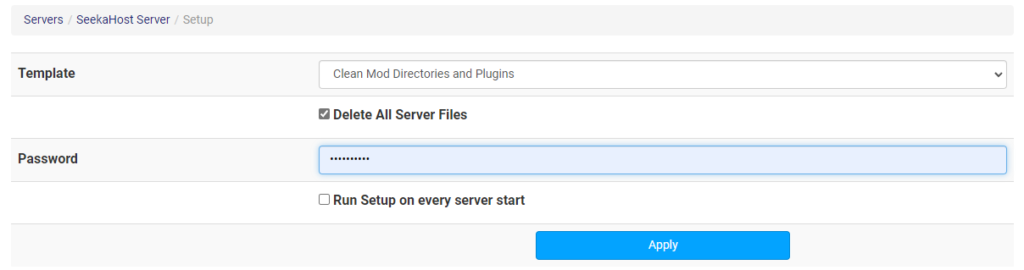
Now we understand the importance of each part of our server files and which ones we want to bring from our backup. We follow these steps on the newer version/updated server. Alternatively if you are doing this on 1 server, then after you take the back up files simply stop the server. Delete all the current server files, save your server in the newest version and start it again.

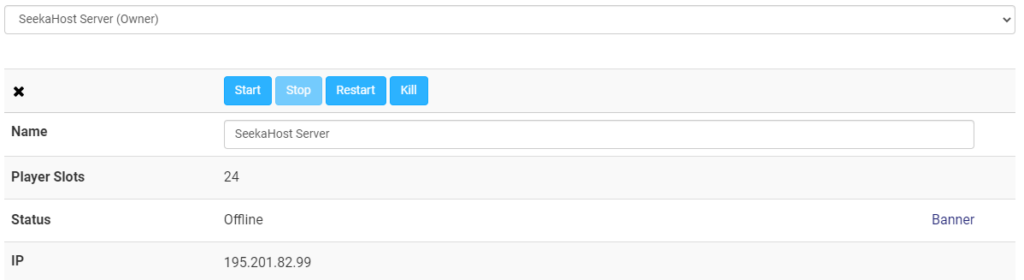
  1. Stop your server (Updated to the version you want to use)
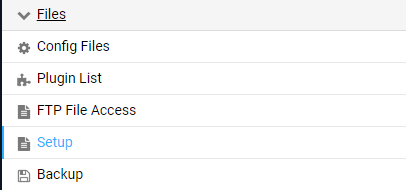
  2. Log into using FTP file access or FileZilla for no size limitations.
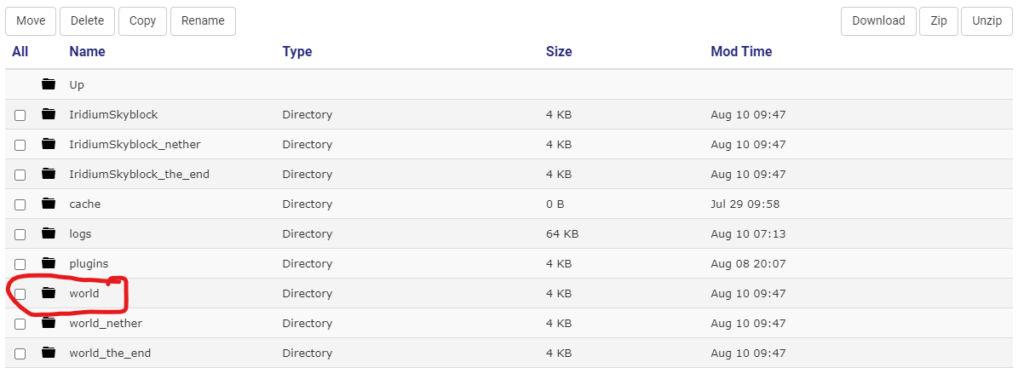
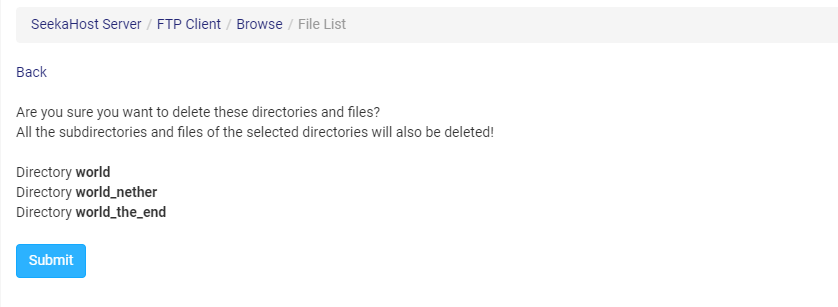
  3. Delete the files on the new server that you have a back up of.
    updating server files minecraft
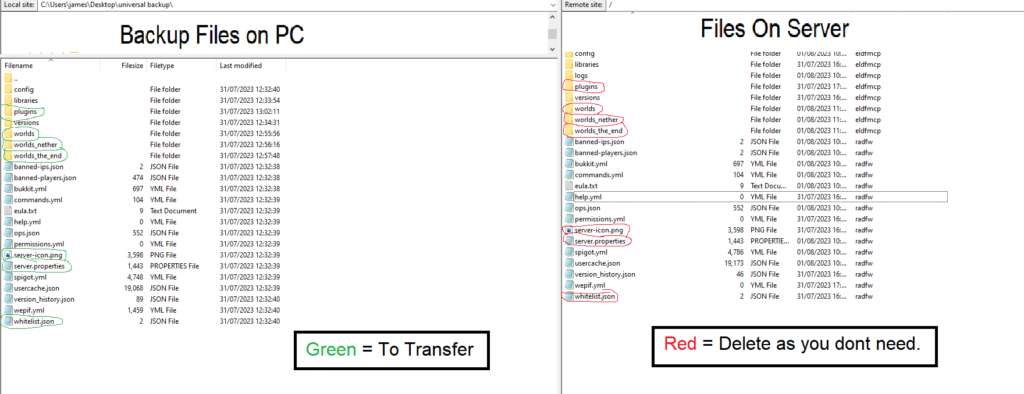
  4. Then move the files from your older version server onto the server side to transfer a copy to your server.
    For FTP file access upload the files using the FTP upload option.
  5. Start your server up

Conclusion

One thing you might find now is that some plugins might now have worked. For this you will need to look for the most up to date plugin and if there even is one for your version. If there is, then delete the plugins .jar only and replace with the new one.

If the plugins doesn’t have a compatible version for the server type you’re using then its time to look for another that will suit!

How to Optimize Your Minecraft Server

optimise your minecraft server

Many server owners have one time or another experienced lag on a server due to some reason or another, here we have a comprehensive guide on

Guide To Optimize Your Server

Allocating enough RAM

Purchasing enough RAM for your Minecraft server is crucial for optimal performance. Here are some recommended values:

  • For small servers with 1-5 players, allocate 1-2GB of RAM.
  • For medium servers with 6-20 players, allocate 2-4GB of RAM.
  • For large servers with more than 20 players, allocate 4-8GB of RAM.

If your hosting your server on a 2gb server and you have 20+ players, the quality of play will be effected.

Optimize your server.properties file

The server.properties file contains various settings that can affect your server’s performance. Here are some recommended values:

  • view-distance: This setting controls how far players can see. A lower value will improve performance. For small servers, set this to 5 or 6. For larger servers, set it to 4 or lower.
view-distance=4
  • max-tick-time: This setting limits how long a single tick can take. Lowering this value can help prevent lag spikes. For small servers, set this to 1000. For larger servers, set it to 500 or lower.
max-tick-time=500
  • spawn-protection: This setting determines the radius around the spawn point where players can’t build or destroy blocks. Decreasing this value can help reduce server load. For small servers, set this to 16. For larger servers, set it to 8 or lower.
spawn-protection=8
  • enable-command-block: If you don’t use command blocks on your server, set this to false to save resources.
enable-command-block=false

minecraft server optimisation
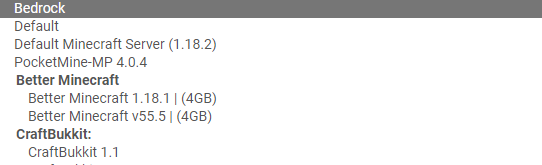
Use an Optimised Server Type

Using a optimised server type can help improve performance. Here are some recommended options:

  • PaperMC: A high-performance fork of the Spigot server software.
  • Tuinity: A fork of PaperMC with further optimizations.

optimised server types
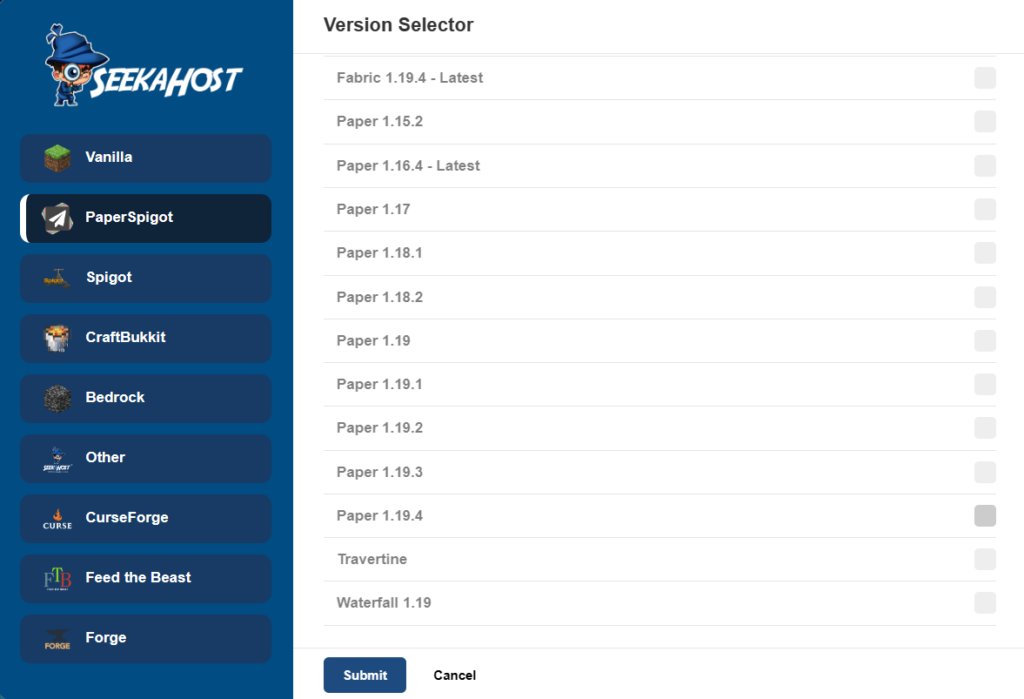
Install plugins and mods judiciously

Plugins and mods can add new functionality to your server, but they can also increase server load. Only install the plugins and mods that you need, and regularly review them to ensure they are still relevant. Here are some recommended plugins for optimizing server performance:

  • ClearLagg: Clears up entities and items on the ground to improve server performance.
  • NoLagg: Optimizes various server settings to reduce lag.
  • LagMonitor: Monitors server performance and identifies performance bottlenecks.

Promote your minecraft server on curseforge

Promote Your Server For No Addition Cost!

Monitor Server Perfomance

Regularly monitoring your server’s performance is crucial for identifying and addressing issues. Here are some recommended tools:

  • Minecraft server status checkers: These tools allow you to check the status of your server and see its performance statistics.
  • Server monitoring software: These tools allow you to monitor your server’s performance in real-time and identify bottlenecks.

Another way is simply by looking at your console start up on multicraft and also check your log reports on your server files.

Pre Generation Your World

You can use mods and plugins to pre generate your worlds. Although this initially will increase the size of your server files. It helps as it doesn’t need to load up as many chunks when players are exploring. meaning that the server is able to keep up with many players moving through chunks much better.

Other optimization tips

There are many other tips for optimizing your Minecraft server, such as:

  • Updating your server and plugins to the latest versions.
  • Using a dedicated server or hosting provider with high-speed internet.
  • Using a dedicated server machine with high-performance hardware.
  • Limiting the number of players on your server to avoid overloading it.

Common Issues That Cause Lag

  1. High entity count: When there are a large number of entities on a server (such as mobs, players, items, or dropped blocks), it can cause significant lag. This is especially true if the server has to constantly process the movement and actions of these entities.
  2. Redstone circuits: Redstone circuits can be very complex and require a lot of processing power. When there are many redstone circuits on a server, it can cause lag.
  3. World generation: When new chunks are generated, it requires significant processing power to generate the terrain and structures. This can cause lag spikes on a server. This is especially tru is many chunks are loaded up fast in the case of flying with elytras.
  4. Plugins and mods: Some plugins and mods can cause lag due to inefficient coding, conflicts with other plugins, or resource-intensive features. Otherwise you can also overload your server with too many plugins that are making too many requests at the same time.
  5. Player actions: Certain actions by players can also cause lag, such as using large amounts of TNT or using commands that generate a lot of entities.
  6. Network latency: High latency between the server and the players can cause lag and delay in player actions. We recommend picking the closest location to your physical location when purchasing a server.

It’s important to note that there can be many factors that contribute to lag on a Minecraft server, and it’s often a combination of multiple factors.

By following these tips, you can optimize your Minecraft server for better performance and a smoother gameplay experience for your players. Good luck.


How To Setup A Bedrock Server With SeekaHost

bedrock server installation guide

A short guide on how to switch your server to bedrock edition using SeekaHost Minecraft servers.

Starting With A Default Server

When you first get your server with us you will notice it says default server. Our default server is Java vanilla version, but with a few clicks you can easily change it to Bedrock.

Bedrock edition is a similar but yet different edition to Java. This only runs on the latest version due to Bedrock only allowing the newest version on the launcher. Unlike java which allows you to choose any version to use and play.

So lets find out how to change your server to a bedrock server using multicraft.

How To Setup A Bedrock Server

  1. First of all log into your multicraft dashboard, if you just got the server check your emails as it will provide the link to go to and the user name and password you require.
  2. Next, stop the server before making any changes.
    stop server to change to bedrock
  3. Now lets delete un needed server files, to do this go to:
    Files > Setup
    setup for bedrock server
  4. From the dropdown menu select, Clean Mod and Directories. Then check the delete all server files option, add in your password and click on apply.
    start a bedrock server with seekahost
  5. Now go back to your main multicraft dashboard and use the server jar drop down menu to select Bedrock.
    selecting bedrock version server
  6. Once selected, press save below and then start your server. Once started you will be able to join with any bedrock account.

Who Can Join Bedrock Servers?

Bedrock edition is also known as windows 10 edition, any pc using windows 10 edition (as supposed to java) can join onto your bedrock server by going to server, scrolling down and selecting add server. Use the ip and port to join and then you can play on the server.

Mobiles can also join Minecraft server easily by following the same steps. The bedrock editions that can join straight away are switch, xbox and playstation due to the “add server” option being taken away.

You can infact get these to join server but it involves a few extra steps like changing your devices DNS or using apps to help it join servers.

How to Change Seed on a Minecraft Server

How to Change Minecraft Seeds on Your Server

Lets look into how we can change the seed on a Minecraft Server. You will be able to load a new world with your chosen seed to play on.

What is a Minecraft Seed?

A Minecraft seed is an identifier to your world creation. For instance I start a world with a certain seed. For example 454545. Any one else starting a world with the same seed would also find the same world generation. Almost like been able to pin point the exact place on the endless Minecraft map of where you started your world off.

You can use this to share with others players so they can explore the world in creative before they travel on survival. All the worlds with matching seeds with have the same creation and characteristics. So you can effectively have another copy of your world.

Just be aware that you cant add a seed to an existing world. You will need to start with a new one to load up the right seed for the world.

How to Change Seed on a Minecraft Server

  1. Stop your server from the multicraft dashboard.
  1. If you want to keep a save of your last world, use the backup option now before we delete it.
  1. Go to FTP File Access > Login > And look for your world file. It will have the same name as the world section of your dashboard. In this example my world is called “world”
  1. Select the file with your world name, and the 2 files below it with the nether and the end. This is so the seeds match all the worlds when they are created. Now select delete to delete the old worlds before we insert the new seed to our server.
  1. Now, from your multicraft dashboard. Go to Files > Config Files > Server Settings > and find the section called Level Seed.
  1. Enter in your required Minecraft Seed and press save.
  1. From your main multicraft dashboard, Start your server. When you join on it will now be on a world with your chosen Minecraft seed.

Conclusion

Using a Minecraft Seed to start your world with is great for many reasons. It allows you to share the world you are playing in. If you find villages or monuments you can simply share the co ordinates and anyone using the same Minecraft seed can find them in the same location.

It also means you can start a world in a specific seed of your choice. Some come with spawn in areas in mushroom biomes, with 4 or 5 biomes surrounding them and many other variations so its worth checking them out first before you choose one to start your world off with.

Related Articles

How to Change Your Server Type in Minecraft

Change Your Server Type

How to Change Your Server Type quickly and easily by changing the jar type.  Switch between Bedrock, Java or modified versions in a few easy steps with SeekaHost tutorials

How to Change Your Server Type Video Tutorial

What is a Server Jar File?

Your server jar file is how your server runs. Supporting mods, plugins and creating a game around the version you are playing. As Bedrock, Java or different version of Java have different playing mechanics or features.

For this reason you are given the option to change your server jar on your multicraft control panel. This way you can change your server to different versions of the game. For example in the video above we swap from a Java paper 1.16.5 version to an official Bedrock server.

Server Types and Benefits

Change Your Server Type

Bedrock Edition

Minecraft Bedrock Edition is a great way to connect and play with friends on different platforms. Minecraft has worked hard to create a Minecraft game that can be played not only on PC, but on Xbox/PlayStation/Mobile and Nintendo Wii.

Game mechanics differ from Java in subtle ways such as Redstone mechanics, combat and a different word/mob generation. In essence all the editions revolve around the same game but Bedrock has been better built to work across different platforms and devices.

Bedrock edition doesnt not have such a large array of free mods, shaders and other features. How ever they do have many paid add ons, skins and other features that can add to gameplay in the marketplace. How ever these are mostly paid modifications you can make to the game.

Servers for bedrock can be easily accessed with both pc and mobile version. How ever other gaming consoles may need to use a 3rd party app to connect to more servers than are originally given to you.

Change Your Server Type

Java Vanilla Edition

Played on PC this is the original Minecraft version and is known to have less in game bugs than Bedrock. Game play is very similar to the Bedrock version in vanilla mode (normal with no modifications)  but does have subtle differences in the ways that mods spawn. Also the way the world generates has small differences along with crafting and combat.

You can choose older or newer versions of Vanilla Java more easily and connect with your launchers. Some use older versions as they find that game play has less bugs or for use with modded servers.

You cant add mods or plugins on vanilla servers as they just consist of normal gameplay. How ever if you are looking for a non modded server which you can add plugins too you have a choice of a few.

We have a video outlining differences between Java and Bedrock here.

Servers That Support Plugins

  • CraftBukkit
  • Spigot
  • Paper
  • Travertine
  • Waterfall

Modded Java Server

  • Curse Forge
  • Fabric

Modded servers allow you to add different modifications to make gameplay different. From adding magic creatures or more ores, to the more extremes of RLCraft or Pixelmon that can have up to 125 mods in one game.

These take a little more time thank other servers as you need to download the correct server jar, add the mods and also add mods to your own pc to connect with them. Curse forge has made client side  much easier with their new beta launcher. Making is super easily to now download mods and connect to servers with them or even play single player.

How to add mods client side.

How to add mods on your server.

How to Change Your Server Type Written Tutorial

Getting Started

First of all you need to stop your server via your multicraft control panel, this will stop any files getting corrupted.

Create a Backup

Optionally you may want to backup your world just in case you want to use it in the future. To do this you can head over to the left hand side of your Multicraft control panel. From here go to Files and then Backup.

Press create back up and once complete it will create a world.zip folder in your server files. To download  simply head to your FTP file access, log in and head down to your world.zip file. Tick the box and then click download on the top right of the page. Now you have a safe saved world in case you ever want to swap back.

Clean Mods Plugins and Server Files

Before swapping to another version of Java or perhaps changing to Bedrock its always advised to clear old files. To do this you need to go to Files and then Setup.

Keep the Clean Mod Directories and Plugins option selected and also tick the Delete all server files option.

Now just tap apply and once your server is started back up again this will take effect.

If you are having problems deleting server files you can also use Filezilla. You can connect your server up using your ftp file access info and delete all the server files prior to starting with your new server jar. A server back up is suggested if you do this method. All new server files will be loaded again once you load up a new server jar.

Change Your Server Type

On your multicraft control panel you can now select a different server jar from the Server JAR. As in the video you can switch edition now to the one you want to use, for example maybe a 1.12.2 version or perhaps forge to add mods.

Press save on the bottom of the page once selected and go ahead and start your server back up. Thats it, your all done and have now successfully changed your Server Jar.

Conclusion on How to Change Your Server Type

Minecraft has many fun editions you can play on, using these few easy steps you should now be able to play with your new modded servers, Bedrock servers or any edition you wish to play next.

Looking to Start Your Own Server?

Change Your Server Type


How to Stop Tnt and Creeper Explosions

How to Stop Tnt and Creeper Explosions

Here we have a quick and easy Tutorial on How to Stop Tnt and Creeper Explosions. Using either commands or a plugin for Java we shall stop any explosion from destroying blocks. This will stop anyone coming onto your server and destroying you amazing builds. We will be showing in both Bedrock and Java edition how to do this. We also have a helpful video on how to protect your spawn if you run a Java or MCPE edition server here.

Why You Need To Protect You Server

Players which gain access to your server may want to destroy your builds and generally try to stop peoples enjoyment of the server it self. For this they may use many tricks, a lot of these can be stopped with a good Anti-Cheat but unfortunately this wont always stop them using tnt or creepers to blow up structures.

If you want to run a successful community on Minecraft, then you want your players to feel safe knowing they can log off and find their house intact when they log in again.

 How to Stop Tnt and Creeper Explosions

Java Edition

For Java we will be using a plugin called Grief Prevention, this will automatically stop any tnt or creeper explosion. Plus it has a load more amazing features that will keep your players houses safe and also items or mobs held inside their property. To download the plugin click the link here.

Step 1

Stop your server before installing any plugin, then download the grief prevention plugin, you can use the link above.

Step 2

Once installed you can restart your server, you are now safe from creeper explosions, tnt and much more.

Bedrock Edition

For Bedrock we will be utilising two in game commands to stop tnt and creeper explosions.

You will need cheats enabled to be able to access the commands.

  • /gamerule mobgriefing false
  • /gamerule tntexplodes false

The mob griefing will stop the mobs griefing the land, for example creepers exploding blocks or withers destroying blocks.

And the tntexplodes command, when set to false will not let tnt explode to cause damage to blocks.

Looking To Advertise Your Server?

Share you Minecraft server or find other ones to join on The Minecraft Servers Discord here.

SeekaHost Minecraft Servers

Minecraft-Server-Optimization

How to Stop /list Spam in Console

We have a great tutorial on how to stop/list spam in console. There is nothing worse than going to check on the server console to find lines and lines of /list displaying on your console. A quick fix is just to add a few more lines of code to stop this happening. We have a video tutorial and a easy step by step written tutorial further down.

It can always be worrying when writing any code, especially if you have never had any experience doing it. To make it easier we have left picture examples displayed underneath.

What is the list command and what does it do?

Multicraft uses the /list command to check if your server is online, as well as the number of players on it. You can also use plugins such as Console Spam Fix to prevent this from showing up in your console and spamming your logs.

Tutorial on How to Stop /list Spam in Minecraft Console

Step 1

Log into your multicraft control panel, then open the Files folder, select FTP file access and then login using your password.

Multicraft control panel

Step 2

On the commands.yml file press edit on the right hand side to edit the code.

Step 3

After – version $1- press Enter to go down to the next line, there press the spacebar twice and type.   list:

Written like this. Space, space, list, colon

Next press Enter again and type  – []

So written down thats. Space, space, hyphen, space, two closed parenthesis 

Step 4

Now go ahead and restart your server, its all done.

Thanks for reading this Minecraft Server Tutorial on How to Stop /list Spam in Console, for any more articles like this, head to the SeekaHost blog.